Showing posts with label Strawberries. Show all posts

Monday, 3 March 2014

Ital is Vital... Vegan Cupcakes

Vanilla Vegan & Gluten-Free Cupcake with Vegan Buttercream and Strawberry Slices

Ital or I-tal (/ˈtɑːl/ eye-tahl)  a diet designed to increase Livity (life energy).

Growing up in a Rastafarian household, there was a time that we ate only Ital food. In it's most purest form, Ital food is akin to a vegan diet minus the salt. In truth though, there are variations on the theme, and it is open to some level of interpretation. For me, when I think of Ital baking, I want to make something that anyone can eat, whether they are vegan, have nut allergies, a gluten intolerance or whatever else can steal the joy of someone wanting to eat a tasty cake.

Irie!

It's been a while since I did any, but last weekend, I tried my hand at a bit of Ital (in this case vegan and gluten-free) baking with a simple cupcake recipe adapted from Ms Cupcakes new cookery book - "The Naughtiest Vegan Cupcakes in Town"

Cupcakes fresh out of the oven
In my little bit of experience in making vegan cupcakes, I've discovered that there are a million ways to make them. Also once you get the right ingredients it's actually quite straightforward (my kinda cooking!)

Whilst I perfect my own recipe to share with you guys, check out PETA's website for a cool, step-by-step guide on how to make vanilla vegan cupcakes (Click here).


Some extra vegan baking tips;
  • Vegetable shortening use Trex (for the British readers)
  • Vinegar means Apple Cider Vinegar or White Wine Vinegar
  • Oil means flavourless i.e. groundnut, grapeseed or sunflower oil
  • I used gluten-free flour mix instead of the usual self-raising flour
  • Work quickly once the liquid has been added to the dry-mix & don't overmix
  • Vegan cakes don't last as long as normal ones so they are best eaten straightaway (which is really no problem at all!)


Vanilla Vegan & Gluten-Free Cupcake with Vegan Buttercream and Strawberry Slices - Ital baking at it's best!

Before I forget, the book is an essential item in a baker's kitchen - it's beautifully put together and the recipes are easy to follow. Get yourself a copy! :)

Peace & Love

xx
Pin It

Wednesday, 15 January 2014

For The Love of Berries...

Table styled by the talented Alexia Lenoir

After chocolate, summer berries are my next favourite ingredient in baking. They taste great with everything, buttercream, cream cheese frosting, cake and especially chocolate. And if that wasn't enough they look amazing. Berries, literally make any dessert look special.


In this post, I've put up pictures of two varieties of my favourite berry themed cakes. The traditional layer cake and a particular favourite, cakes in a jar! :)


Blueberries go very nicely with strawberries and summertime is when they are at their freshest. Cupcakes in a jar make great gifts. Depending on the size of the jar you can get the equivalent of up to 3 cupcakes in there. The one pictured has 2 cupcakes, perfect for that, 'I'll save a bit for later' moment! :)


Recipes & how-to's
(click the links for the details)

Vanilla cake recipe (double for a three layer cake and use 7" sandwich tins)

Buttercream recipe (double for a three layer cake)


Top liberally with blueberries and strawberries (sliced), there is also some fresh mint leaves on the cake and a sprinkling of icing sugar.


Peace & Love
xx

Pin It

Sunday, 5 January 2014

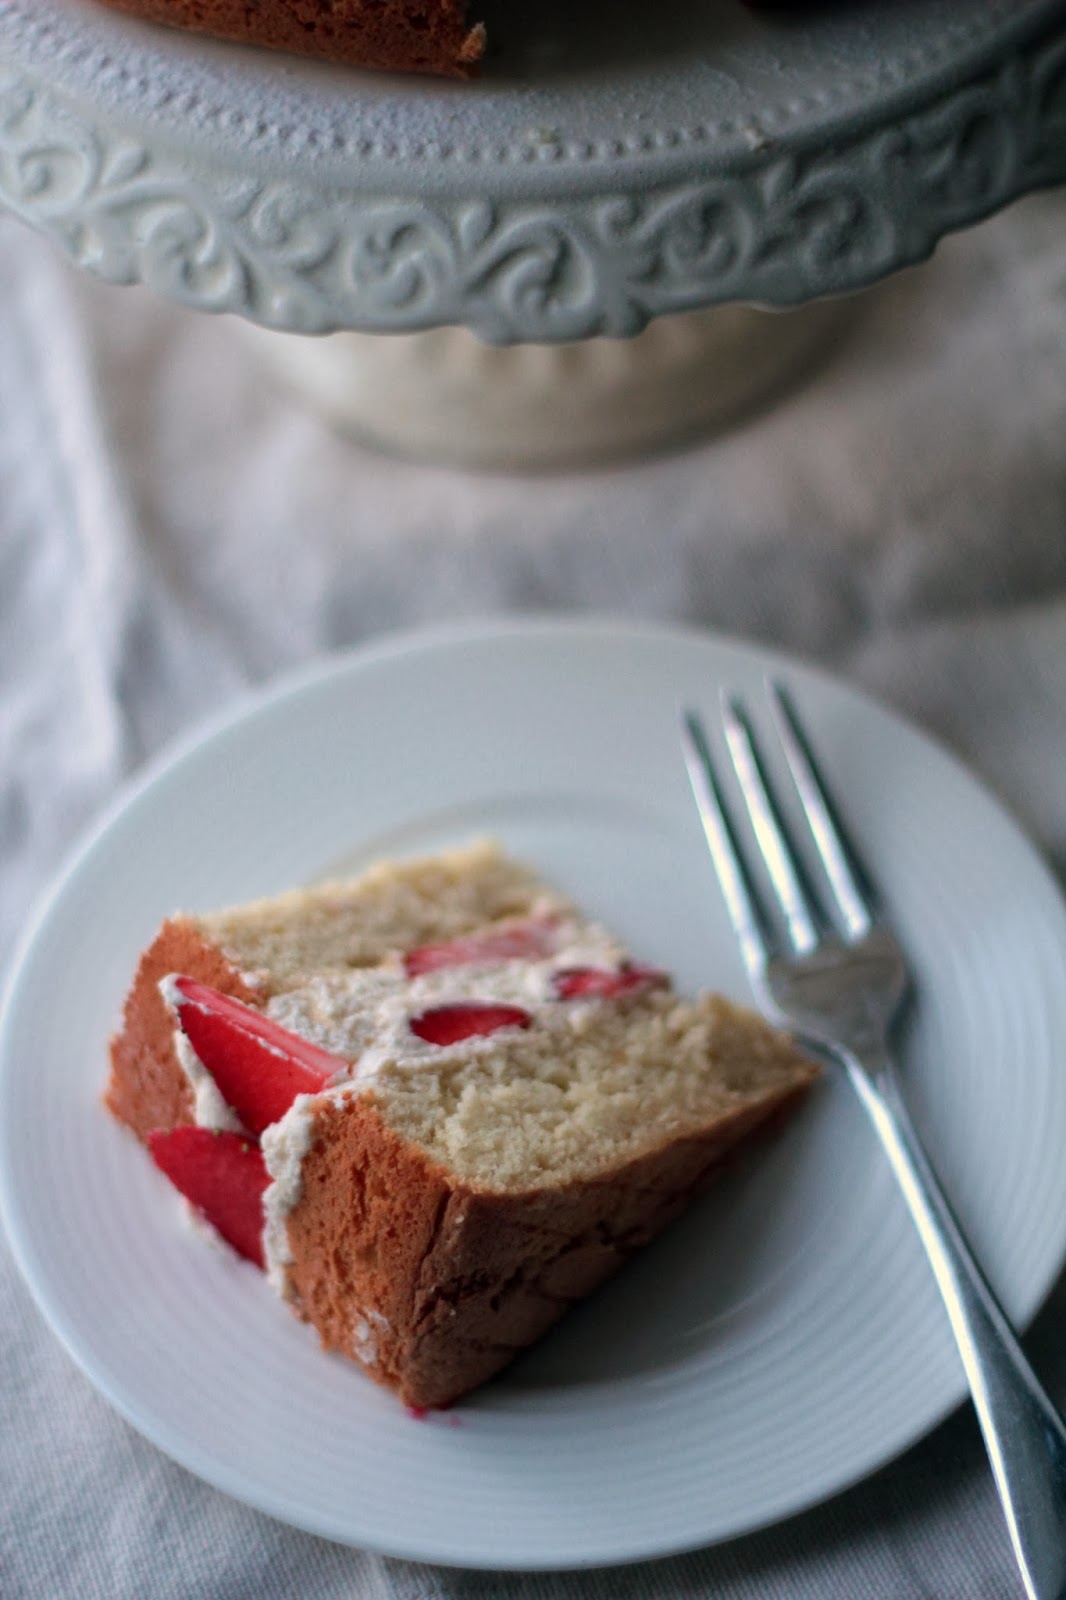
Japanese Strawberry Shortcake


Over the Christmas break, I slept and slept and slept and pretty much camped at my sister’s house. Like Dorothy who followed the yellow brick road, I followed the Christmas leftovers! One day whilst eating my sister out of house and home, I came across a baking magazine and saw this beautiful recipe.

Now my preference is for simple recipes; a handful of ingredients, one or two steps and we’re off. But this was such a pretty cake, a bit enchanting really, and I decided to go for it.

This cake is not for the faint of heart or those that have things to do. It took me a while to get through, although I was moving at a leisurely pace so that may have something to do with it. 


Japanese Strawberry Shortcake

(adapted from a recipe by Roger Pizey)
Serves 6

Shortcake
4 eggs separated
120g (4oz) caster sugar
3 tbsp full fat milk
½ tsp vanilla extract
120g (4oz) plain flour, sifted
25g (1oz) unsalted butter melted

Jellied Crème Chantilly
1 leaf of gelatin, softened in iced water
2 tbsp water
240ml (8fl oz) double cream
25g (1oz) icing sugar
½ tsp vanilla extract

Syrup
50 ml dark rum
2 tbsp l water
½ tsp vanilla extract

To Decorate
500g (11lb 2oz) fresh strawberries
Icing sugar to dust

Raspberry Coulis
200g (7oz) caster sugar
500g (11lb 2oz) fresh raspberries

Fruit Glaze
4 tbsp clear apricot jam

Special Equipment
A strip 10cm (4in) deep acetate paper (you can get this from a florist or cake decorating store).

Instructions


1. Preheat the oven to 170oc/Gas Mark and grease and line an 18cm (7in) loose bottomed cake tin with baking paper. 
2. Beat together the egg whites and sugar until they are stiff and glossy. Add in the egg yolks and whisk again.
3. Add the milk, vanilla extract and the flour and fold into the mixture. Then fold in the melted butter.
4. Pour the mixture into the tin and bake for 30 minutes or until a skewer comes out clean when entered into the centre of the cake.
5. Remove from the oven and leave to cool for at least 10 minutes before removing it from the tin and cooling on a cooling tray. Chill the cake in the fridge while preparing the other ingredients.
6. Make the jellied crème Chantilly. Soften the gelatin in iced water (this removes any residue). Discard this water. Heat up the water in a small pan and dissolve the leaf in the hot water. Allow to cool for 10 minutes.
7. Meanwhile, whisk the cream, vanilla and sugar. Gradually add the gelatin and whisk slowly until the cream has thickened. Transfer the cream to a piping bag.
8. Make the syrup. Place the water, rum and sugar into a small pan and bring to the boil. Leave to simmer for 5 minutes and then take off the heat to cool.
9. Cut the cake in half horizontally, then brush away any excess crumbs. Ensure that the cake has cooled all the way through. If it is still warm inside then leave to cool for a few more minutes – it should not be warm to the touch.
10. Keep five or six strawberries for the top of the cake. Slice the rest of the strawberries into four or five slices each.
11. Line the inside (the side) of the baking tin used to make the cake using the acetate paper and cut to fit – it is ok if the paper comes out over the top of the tin.
12. Place the bottom layer of the cake back inside the tin and brush with some of the cooled syrup.
13. Pipe a thin layer of cream over the sponge and arrange strawberry slices around the edge, lining it against the acetate paper. Fill with the sliced strawberries and cream.
14. Dot the underside of the top layer with the syrup and carefully position it on top of the strawberries and cream. To get a really clean edge, you will need to tighten the acetate paper around the cake or you may find that the filling bulges out of the edges. Set in the fridge for at least an hour.
15. Make the fruit glaze. Heat the apricot jam and 1-2 tablespoons of water in a small sauce pan and warm it through, so it loosens up and becomes more liquid. Lightly brush the fruit to glaze. Or make the raspberry coulis. Put the sugar and raspberries in a blender, pulse and then strain through a sieve. Dip the whole strawberries in the coulis and set aside.  The cake in this picture was made using the raspberry coulis but next time I will definitely glaze the fruit. It depends on how sweet you want the strawberries to taste, I found the raspberry coulis a little tart.
16. Remove the cake from the tin and carefully remove the acetate paper. Liberally sprinkle icing sugar over the top and decorate with strawberries.
17. Serve with an alcoholic beverage …. I say this because you have worked very hard indeed. You could always have tea though, the choice is yours.


You can probably make this cake in a fraction of the time using a traditional vanilla cake recipe with whipped cream instead of the jellied crème Chantilly. I think if you lodge the strawberries around the edge using the cream & then wrap the cake using some lightly greased baking paper, you may get a good look... Either way, let me know how you get on if you try it!

Peace & Love
xx
Pin It

Thursday, 31 October 2013

Easiest chocolate fudge sauce recipe ever!


If you know me, you'll know how excited I get when anyone asks me to make a chocolate cake. I think I got into baking for the sole purpose of baking chocolate cakes.

What you may (or may not as the case may be), surprised to know, is that there is an art to getting chocolate cake right. You need the right quality chocolate and sufficient moisture to make it wonderful. Dry chocolate cake is like stale cake - an exercise in disappointment and dissatisfaction.


Similarly, getting the right frosting to accompany said cake is another skill in itself. One of my favourites is the mighty chocolate fudge sauce. Fortunately, fairly early on in my chocolate fudge making journey, I stumbled across the easiest recipe ever from Nestle (click here for the recipe). 

Once you've got the perfect cake (complete with vanilla biscuits and strawberries no less), then all that's left to do is adorn the cake with candles and sing harmoniously to the birthday girls.


Peace & Love

xx


Pin It

Wednesday, 17 July 2013

Bailey's Birthday Vibes...

Hello People!

I'm lucky that I've been blessed with a beautiful family. Last week my niece Bailey turned 2 and ordered two birthday cakes, one for each of her favourite TV characters; Peppa Pig and Rastamouse. 

Peppa Pig Cake

Rastamouse Cake

At the weekend we had a family picnic, one of those things that you say you're going to do every 'summer' but usually the weather or people's busy schedules put paid to that. However, this year we finally got our act together & made it happen & it was beautiful!

Beautiful Bailey!

Beautiful Bailey!
Picnic Time...


Speaking of weather, I'm still trying to come to terms with this continued sunshine & heat that we're having! It's been an actual summer - something which has left a lot of us confused as to what to do with ourselves & more importantly what to wear - I'm not complaining though! :) 

Me & Bailey when she was born


Me & Bailey :)

Anyways, I hope you enjoyed the cakies & pictures. I'm going to get back into the kitchen to get ready for my next little girl's cake... This time the theme is Pirates!

Peace & Love 
Xx

Pin It

Monday, 24 September 2012

Thank You

Victoria Sponge Cupcakes
A few weeks ago I was in a lovely cafe in Bow called Muxima and a customer noticed me reading a book by Haruki Marakami. We started chatting about his writing style and she said that she had some of his books and was looking to give them a new home. She then left the cafe to go back to her flat & returned with a hardback set of his 3 part novel 1Q84. 

Murakami 1Q84 Books One, Two & Three

I was quite taken aback as I was expecting some tattered paperbacks and I felt a bit embarrassed to take something like this from a complete stranger. I LOVE books so this was a really special treat for me, plus I am a big fan of his work.

Thank you cupcakes

I decided to make her some cupcakes to say thank you. I figured she'd be going back to the cafe at some point (she is a regular), so if I didn't see her again, I could just leave them there for her. As it turns out, she was there when I went in and I think she was equally embarrassed by my gesture!

I found it quite interesting and funny that we both felt awkward when we were shown a kindness. It's a bit like when you get a compliment and you don't really know what to do with yourself, so you just brush it off.


And on to the cakes... These cuties are vanilla cupcakes with a tiny spread of jam, a layer of strawberries and then a generous topping of vanilla buttercream. Delish!

Victoria Sponge Cupcakes
May your days be filled with the giving and receiving of random acts of kindness :)

Peace & Love

xx

Pin It

Wednesday, 30 May 2012

Baking With The Family...

One of the best things in life is to be able to hang out with my niece and nephew. We made strawberry cupcakes the other day and we had such a good time.  Here is a photo log of our day :)
DJEL1DJEL2DJEL3DJEL4DJEL5DJEL6DJEL7DJEL8DJEL9DJEL10DJEL11DJ12DJ13

Peace & Love

xx


Pin It

Monday, 14 May 2012

Portugese Custard Tarts


Today's offering of Portugese Custard Tarts come from my newest book purchase 'Recipes from my Mother for my Daughter' by Lisa Faulkner. I'm really enjoying this book, the recipes are quite simple and it's basically filled with things I actually want to eat. 

I amended the recipe in the book slightly because I didn't have all the ingredients. I went to the shops with a list of things I needed and came out with 3 bags of shopping and nothing on the list! This unfortunately is not a one-off for me, I actually love supermarkets. Like, really love them. There was a time that I'd sneak off to the supermarket at 2am and spend 1.5 hours just wandering around looking and buying. Plus I'm a sucker for the supermarket tricks that force you to walk through the whole store and pick up things you didn't go there for. They pretty much get me every time, I just get excited. I'm in recovery now and am getting better at sticking to the list but sometimes I have a relapse, like today :).


So without further ado, here is the recipe

Portugese Custard Tarts (makes 12)

Butter for greasing
250ml (8oz) double cream
150ml (1/4 pint) milk
1 vanilla pod, split lengthways
4 egg yolks
2 tablespoons of cornflour
125g (4oz) caster sugar
150g ready-made puff pastry (chilled)
Flour for dusting
Handfull of blueberries and strawberries

1. Preheat the oven to 190ºC (375ºF), gas mark 5 and grease a 12-hole muffin tin.

2. Put the cream and milk in a saucepan. Scrape the seeds from the vanilla pod into the saucepan as well as the empty pod. Bring to a simmer then take off the heat.

3. Whisk together the egg yolks, cornflour and sugar in a mixing bowl until it becomes a paste. Sieve the milk mixture into the bowl of egg paste and mix together quickly and thoroughly.

4. Return it all to the saucepan and heat over a moderate heat until it thickens but don't let it boil. Take the pan off the heat.

5. Whilst the custard is cooling, roll out the pastry as thin as you can, on a lightly floured surface. Roll it up into a sausage and cut it into 12 discs. Roll each one to about 3½ inches in diameter and gently press them into the holes of the muffin tin. Lightly prick the bases with a fork and fill to just over halfway.
Add 1 or 2 pieces of fruit per tart. (I added a couple of slices of strawberry and 1 blueberry per tart.)

6. Bake in the pre-heated oven for around 20 minutes until they are browned on top. (note - my tarts did not brown so I put them under the grill. You must keep an eye on them though or they'll burn, not that that happened to me or anything...)

Leave to cool in the tin, before carefully removing them and enjoy!

The original recipe uses lemon rind (add at the milk stage) and I've also seen recipes with cinnamon which I think would taste perfect. That said I LOVED these tarts. I probably ate 6 of them and then had to exercise some restraint and share them with the family.

Let me know how you get on!

Peace & Love

xx
Pin It

Thursday, 5 April 2012

Pavlova and beautiful things...


I never thought I'd say this but retail therapy no longer has the same appeal. The endless accumulation of things I don't need is a bit tiring. But food has that amazing quality of being necessary, tasty and able to bring joy to you and to those around you.

Last week I needed to bake myself happy. I was on the brink of some almost too good-to-be-true news and I was tingling with excitement at the thought of it coming to fruition...and then it didn't. I wanted to be all Zen about it in the knowledge that it wasn't meant to be, but the truth is, it made me sad. 


I took matters into my own hands and looked for something simple and beautiful to make. I came across a lovely recipe for Pavlova online (click here for the link) which ticks all of the boxes in my book. It's stunning and summery and surprisingly easy to make.

I had a full house that day & everybody squealed with excitement when they saw it. I think the best way to eat it, is for everyone to sit round the table with a spoon and just dig in! A mouth full of crispy yet chewy meringue, whipped cream and summer berries is enough to bring a smile on anyone's face.


So with a beautiful dessert made I set about dusting my shoulders off & moving on.  I'm hopeful that 'too-good-to-be true' things are still on the horizon and I look forward to sharing them with you!

I'll leave you with this quote I found today;

Things turn out best
for the people who
make the best of
the way things turn out. 


Peace & Love


xx

Pin It

Friday, 23 December 2011

Day 23 - Strawberry & Chocolate Tartelettes


Things are getting more and more hectic in the run up to Christmas, so quick sugary pick-me-ups are the order of the day! 

If you've been reading my blog you will know that I am a fan of strawberry tarts & tartelettes. Add some warm chocolate ganache et voilà, you have an awesome dessert. Go one step further & dollop on some extra thick double cream and you are in a chocolatey heaven! The tartelettes were gone in seconds, I could barely wait to take pictures!


The chocolate ganache I used is a mix of single cream and dark chocolate, as it was used as a base to ice a cake but the traditional recipe is made with equal quantities of double cream and dark chocolate. Click here for an example recipe. The key to a good ganache is to use good quality chocolate, don't bother with the value brands!


Well I'm off to get back to preparing, I hope you guys are more organised than me!

Peace & Love

xx
Pin It

Monday, 2 May 2011

Chocolate is the answer, who cares what the question is...

 Can all the chocolate cake lovers please stand up?


I hardly ever get requests for chocolate cakes. It's always plain sponge or cakes that "aren't too sweet". This always throws me because surely cake is sweet. In my head, I'm like "So do you want a cake or a vegetable?" 

What's more distressing is that I have spent years perfecting the chocolate cake as I thought this was obviously the most important cake... Apparently that is only the case for me!


I'm being a bit of a hypocrite to be honest, as I don't like it when cake is too sweet either. I think that is a quintessentially British thing. We like middle of the road, nothing too fancy. I've noticed Americans have an amazing array of flavours and combinations but if I suggest anything like that to someone here, they give me a strange look & then say "that sounds great, but can I have a vanilla sponge please, nothing too sweet?"


Sometimes it's nice to do something a bit different so I did.

This cake is basically anti-establishment; it's rich, decadent and totally over-the-top. Four layers of Death by Chocolate sponge; filled with strawberries & cream, then covered in chocolate buttercream and Oreo cookie crumbs.


One slice of this cake probably meets your daily calorie requirement!


Bonus How To Picture Guide:

Step 1

Bake your cake. I've gone for four layers so I sandwiched two pairs together with the chocolate buttercream, but I'm sure that two would be fine.


Step 2


 Put the layer with the topping in the freezer for about an hour so that it hardens and can support the top layer.

Step 3


And there you have it... I think it looks pretty impressive and can feed quite a few people. My cake is only 6" round but because it is so deep and rich you only need thin slices.


Enjoy
x

Pin It

LinkWithin

Related Posts Plugin for WordPress, Blogger...